In addition to ham radio, I am also a bit of an experimenter with computers and networks. Quite a few years ago, I started playing around with DD-WRT for consumer equipment, and happily ran different iterations of that over the years. As a fan of gaming and video streaming, I have always looked for ways to improve my network speeds and, with how easy it is to crack wifi anymore, my security as well. I also have three kids, so I am not only worried about how secure things are, but online safety is a concern that has grown with my children. The older and more connected they become, the more advanced my filters and firewalls have to be.
I addressed the firewall issue in my project article about Sophos XG. There are several pieces of equipment that run my home network and I will cover them here. The first piece is the aforementioned Sophos XG firewall. It is contained in a Rosewill brand 2U case, and does a great job! Read the linked article above for detail on it.
Rosewill 2U case
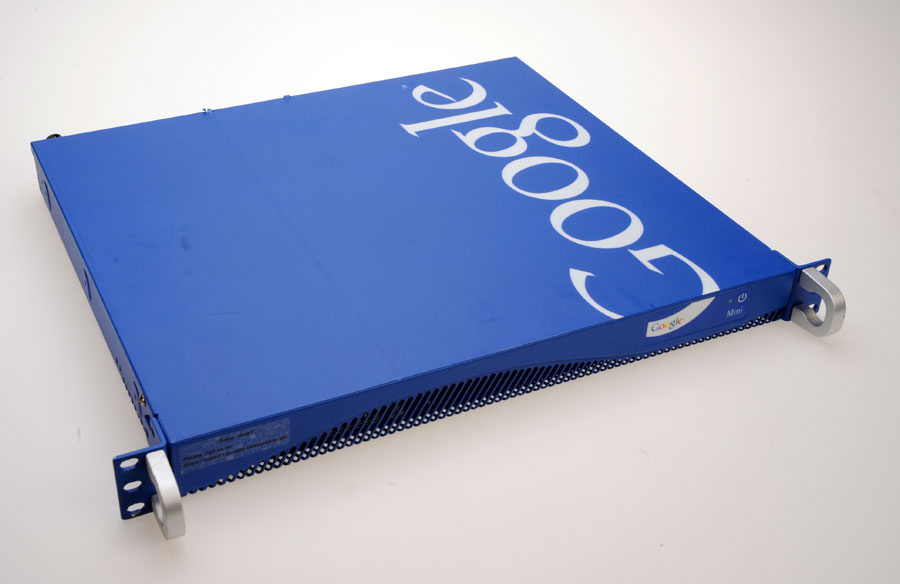
The next item is my RADIUS server. I have it running on an old Google Mini Search Appliance. This is a cool little box that I picked up pretty cheap. The OS is Ubuntu and is running FreeRADIUS. It handles this task well and I am probably going to move my TFTP server (more on that below) over to it before too long.
I am a big fan of home network security. As the father of three kids and the one in charge of the network at home, I am constantly worried about online safety. Over the years I have tried many different security solutions and am now running Sophos XG at home. Sophos is one piece of my home setup, and you can see more of my setup here.
A few years back, I got tired of the constant reboots I was having to do to my consumer router. It seemed that if I didn’t reboot it every few days to a week, it would cause my network to become laggy. I had the problem in varying forms and severity across several routers. I decided to switch to Ubiquiti equipment, and ran that up until this year. I used an EdgeRouter Lite as my main router and a UniFi UAP-LR as my access point. This was a great combination for many years. I also used Open DNS as a content filter for many years to help the inside to outside security.
Although the EdgeRouter was a great router/firewall and OpenDNS a great filter, I really wanted the filter on the local network. The more network between my users and the equipment protecting them, the more vulnerable the protection is. With OpenDNS, there was a lot of network in between, most of which was out of my control. I read about hardware/software firewalls like pfSense, Sophos and Untangle and was really interested in using them as a solution. After looking into the available options, I wound up choosing Sophos XG as my firewall. There really isn’t a well defined reason I chose it, as all three options are really solid.
Having picked up an old Dell Poweredge 1950 III a few years back, I wanted to stay with rack mount type equipment for my network stuff. I wound up grabbing a Roswell brand 2U case and a Lenovo ThinkCentre with a core i5-2500 3.3GHz processor and 4GB of ram. I pulled the hardware out of the ThinkCentre and put it in the 2U case. 4GB is the Sophos home user (free for home users) RAM cap, so the ThinkCentre’s hardware worked out perfectly.
So, it looks like DMR is really making the rounds and I found myself interested. After looking into it, one of the cool things I discovered was the ability to create your own DMR gateway using a DMR hotspot that can be purchased as a kit or fully assembled. The hotspot typically consist of a digital board with a built in low power UHF/VHF transceiver that connects to a small form factor board computer of some type, usually the Raspberry Pi. The computer provides the control of the board and the connection to the internet via (usually) wifi. There are quite a few types of hotspots out there, but they all fall into the two basic categories of simplex and duplex. I opted to go the simplex route (cheaper), but will probably wind up buying a duplex version down the line just to test it out.
Within the simplex category of DMR hotspot, there are quite a few variations and manufacturers to choose from. The price range goes from sub-$100 to several hundred depending on whether it is a kit, prebuilt, built & configured…the list goes on. You have Jumbospot, ZUMspot, DVMega, several by SharkRF, DV4mini and Nano-DV just name name a few. I had a rather low amount budgeted so my main factor going into this was price. At the time of my purchase, the cheapest option was the Jumbospot purchased as a kit without the Raspberry Pi Zero that controls it. I purchased a kit with the Jumbospot board, case, antenna, OLED display and some hardware on eBay for about $45. The Raspberry Pi Zero, I picked up at Limor “Ladyada” Fried’s (AC2SN) website, adafruit.com. I chose the version of the Pi without the headers to save a few dollars as the Jumbospot kit comes with the needed headers for the board. The Pi cost $10, and I opted to add one of the quality 5V 2.5A micro USB switching power supplies that can be purchased there as well for $7.50. I already had the microSD card on hand, but if you don’t have one they can be picked up pretty cheap anymore. There is software needed to make this all run, and that can be found on the Pi-Star site. Pi-Star is a fantastic bit of work by Andy Taylor (MW0MWZ), who credits quite a few people for assisting in the great product we now have.
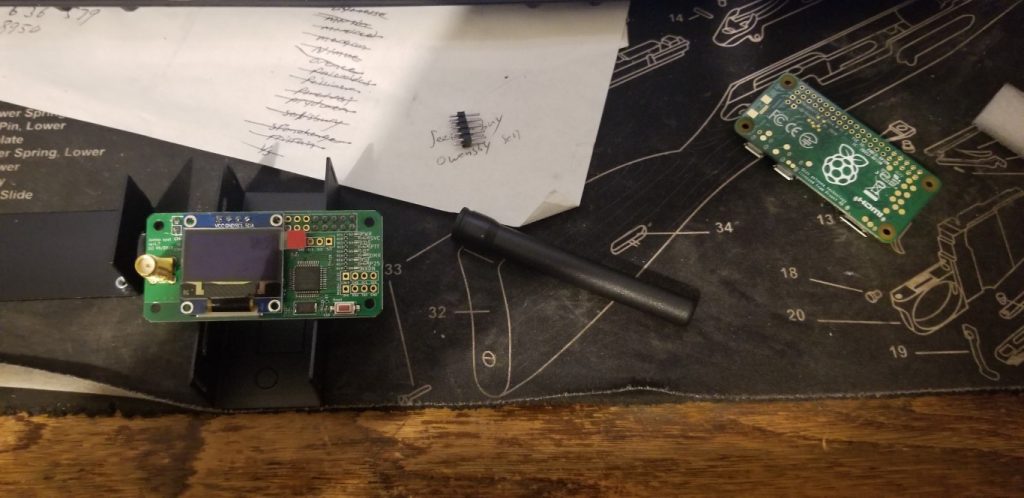
This article was a bit of an afterthought to the build and so I am missing some photos, such as everything still in its packaging. That said, here are the photos from the build. Pardon the mess, I built this at my computer desk instead of going out to my workbench as I probably should have.
Here is the Jumbospot on the left, sitting on part of its case. The Raspberry Pi Zero is to the right. One of the two headers is on the sheet of paper, antenna in the middle. Continue reading →
Well this, as usual, is long overdue! The last two days have been busy. I finally updated my website for the first time in about a decade! I was running the very old 1.0 version of Joomla and refused to upgrade because I knew I would lose the template I had. I was pretty fond of it and was sad to see it go. Since so many things have changed with Joomla since 1.0, the act of upgrading to the current 3.9 version would have been rather labor intensive. Since I don’t have a lot of content, I decided it was easier to scrap the old site completely and import the content into a new install of WordPress. So far, I am pretty happy with the new look.
I am in Southern Illinois these days, near Scott AFB. I just moved here about a month ago and am still trying to get settled in. I programmed up my HTs and a Motorola mobile that I have next to my computer and attached a ladder line J-pole to it that I hung on the wall. I need to figure a better place to put it though. My wife asked if I was planning on keeping the antenna there permanently and we have been married long enough that I know a rhetorical question when I hear one! I will figure something out.
Only temporary!
Hopefully I can get involved with some of the groups here, so far they seem good and active! There is a meeting next week and I will see if I can make it. There are a few DMR repeaters here too, so I may need to pick up a radio and try that out (like I really need an excuse? Ha!). I need to crack out my digital stuff and see what all I can have fun with.
Welp, that’s it for this update, hopefully there will be another one before another few years go by!
As part of my fox build, I needed a way to control the transmitter and also broadcast the proper ID to comply with FCC rules. There are a number of products out there, but I chose the Piccon from Byonics (Website link). Byonics has several very cool devices for amateur radio and most have the option to be purchased in kit form or pre-assembled. I admit, I am usually lazy with my free time and would rather jump right into using my new toy instead of having to build it first. This time however, due to the fact that I was spending money on other parts and pieces, I decided to save a few dollars and just order the kit. The kit arrived in a nice compact package as you can see below and had all of the parts and instructions.
Well, I decided to do a semi-review of a shooting stand I picked up recently. I say semi-review, because I have not yet been able to take it out in the field and use it. Once I do that, I will likely update this article. My initial impressions have been good and I thought I would share this with a few people. I felt it was a pretty solid design and fairly inexpensive. The stand is manufactured under the name, The Last Stand (http://www.laststands.com/), and currently sells for $39.99.
It is a pretty simple idea really; take rebar and a pair of well-designed hardened rubber brackets and make a stand. Here is a picture of the packaging.
Well, here it is, June already. Lots of stuff going on around here.I am working with a local ham by the name of Mike Anderson (WV7T) to upgrade from Tech to General. I picked up some new equipment, a FT-747GX, SWR meter, and a MFJ-901B antenna tuner. Hopefully I can get my General and get on the HF bands this summer. I got my dual band 2m/70cm installed in my dodge truck and shelved the mag mount in favor of a Larsen NMO 2/70B antenna. It was a nice clean install with the cabling run under the carpet and trim panels. I used the separation kit so that the transceiver can be bolted to the floor under the seat and head mounted to a Lido LM-300 gooseneck mount. I also ran a remote speaker up the side of the truck and mounted it just above the seat belt. The wires are tucked away behind the trim panel on it too. It puts the speaker close to the left side of my head and makes it a lot easier to hear over road noise and the stereo. I am looking forward to helping the Pikes Peak International Hill Climb this year. At this time, it looks like I will be assisting at the start line area. The hams here provide communication and spotters up along the course. This allows for quick response time when there is an incident or safety issue. Several other things I could probably mention, but I will save those for next update.
It has been nearly a year since my last update. Wow, I am horrible about keeping current. Well, my last update had me headed back to Abilene, but since then I have moved to Colorado Springs, Co. Along the way I was able to get rid of the Sebring (good riddance!). I spent time today installing my IC-208H in to my Ram 1500. Install went well and I was able to tuck all the wiring under carpet and trim panels. It made for a very clean install. All I really have left is to buy a mounting bracket for the radio’s control head. I really don’t feel like getting smacked in the face by it in the event of an accident. Apart from that, I have been slacking in relation to ham activities. I have had the application to PPRAA sitting on my shelf for a while. It is even all filled out! Now that my radio is installed again I guess I will get that sent in.
Apart from all that, I am enrolled at the local community college, PPCC. I need to use my GI Bill benefits, after all I paid for them (in time and money!). I live up on the Air Force Academy and am liking it up here. I feel like I am living in a rural area which I wouldn’t have if I lived in Colorado Springs itself. Not much else going on, I guess things are fairly routine at the moment. I guess I can’t complain, things are going okay. Well, hopefully I will update this a little more often and will do so once I get that application mailed off! There is something to be said for having an electronic application on the website that is tied to something like Google checkout. Hopefully radio clubs will start tying that kind of function in to their website in the future. Attracting younger generations of hams will require adopting modern processes and technology for sure. . .
NOTE: This project was never finish. A move interrupted and I wound up getting rid of the bulky parts. There is still a little bit of good info, but wanted to provide fair warning before you begin to read this.
I had a Dish Network dish that moved with me from Texas to Colorado. It turns out that the dish is not compatible with this area and they put in a new one. The installer did not want the old one and advised me to throw it away. So there I was; I could throw out a perfectly good parabolic dish or find a project to do with it. Being the pack rat I am, I opted to find a project. Google found me several good ideas, and I settled on a cubicle bi-quad antenna build that will then be fitted to the dish. I found several sources of information and am building mine based on bits and pieces of the following guides:
I forgot to take some pictures of the dish before I started messing with it. Here is a pic I found of the exact dish I have just to give an idea of what I am starting with.
Well, I decided to list the equipment I currently own. This will not be a complete list, as there are one or two things that I cannot recall the name/model of. Heh, on my salary the list is going to be rather short.
I also have a stash of components (caps, diodes etc) that I will share if you are local and in a bind. Let me know what you need.